Friday, October 28, 2011

Make Your Own Halloween Plates

I made these Halloween plates by printing on contact paper and adhering it to the bottom of a glass plate.
Here is what I did....

1. I purchased glass plates from the $ Store and washed them. The sticky tag didn't come off nice - so I put some peanut butter on and scrubbed it off.

2. I printed out a circle from my computer and tested on my plate for size - I was lucky the first time - I got a size that worked. It is best if the circle is a little smaller than the flat circle part of the plate.

3. Cut out two pieces of contact paper that will fit over the circle. With one of the cut out contact papers, put double sided tape on the peel off backing and adhere over the printed circle. The plastic side should be facing up to be printed on. I used two varieties of contact paper - one from the $ store and the other from Zellers. The Zellers contact paper was way better quality and not as shiny. Both did work but I definitely liked the matte contact paper.

4. On your computer, copy and paste desired images in the circle - if you use printing reverse it. The images I used were from Graphics Fairy. Click Here to go to the skull - Click Here to go to the Skeleton Man. Put the contact paper sheet through the printer in a manner that the image will print on the contact paper.  Do not touch image as it is like a dry erase board and the ink will smear.


5. Take the pre-cut contact paper - peel off the back and stick it on top of the printed contact paper. You might get some bubbles - but most if not all of them can be worked out by pressing them firmly.

6. Remove the contact paper from the printer paper. Cut around circle.

7. Remove backing.

8. Apply to plate. If you have the good quality contact paper, it can be removed for washing and put on again after. Stick it on the fridge or window until dishes are washed and re-apply if desired. The cheaper contact paper didn't work so well taking it off and using it again.

So there you have it - make your own custom Halloween plates!

Check out some of my other Halloween posts...


Thanks for stopping by!
Linking up to...


Halloween Food Ideas 2011


I saw this CUTE idea and HAD to do it. Please go look at the blog where I got this idea from. It is called "The Smith Family" blog. She has a whole Halloween party laid out for you to look at - FABULOUS. I liked this idea because it was super easy and super cute. CLICK HERE to go to the post.
Sandwiches are easy to make - the only extra touch is printing out the clip art, cutting it out and adhering the legs and hats to toothpicks. 
Here are the links to the clip I used - LEGS CLICK HERE   HATS CLICK HERE

I saw this idea on BHG. They had a refried bean dip with lettuce for grass. I made a black bean dip RECIPE HERE, and made guacamole for the grass. The guacamole helped hold up the tree and grave stones. Cut out shapes from tortillas, brush with oil, cook until golden brown. 

Also, check out the gingerbread skeleton men I made. Click HERE to go to the post.

Thanks for stopping by!

Linking up to...


Thursday, October 27, 2011

Gingerbread Skeleton Man Cookies


I saw this really good idea on Pinterest - gingerbread men that were iced like skeletons. Gingerbread cookies are one of my favorite cookies. The secret I think to good gingerbread is to not cook them that long. The longest time I leave my cookies in the oven for is six minutes - but it does depend on how thick they are. Click here for my gingerbread cookie recipe - and the royal icing recipe.

My icing is something that needs to be improved upon - but I basically strived to make a bone shape in each arm and leg - an anchor like piping for the ribs, and then the skull. My icing could have used a bit more sugar to thicken as it spread a bit after I piped it - but I got the hang of icing after a while. The first few were really creepy looking - but hey - they are for Halloween!

Thanks for stopping by!!!

Wednesday, October 26, 2011

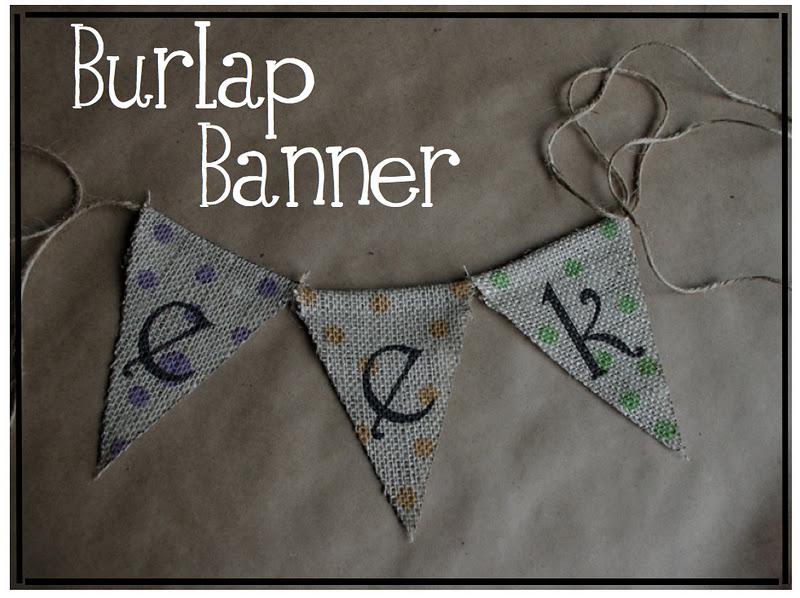
Halloween Burlap Banner

I have been admiring the burlap banners that I have been seeing around - and I thought I would make a couple of small banners. I recently tried printing on burlap with the Thanksgiving Block project - and it was so much fun - I wanted to run burlap through my printer again but this time using a bit of color.
       I made an "eek" banner and a  "boo" banner.
This is how I did it....

1. I made the graphics on my computer (I have the images below so you can use these for personal use). I ironed burlap to freezer paper and then ran it through my printer. Last time I don't think I ironed the freezer paper to the burlap long enough - when it went through my computer it made a freeky sound - but it still worked - this time it didn't make the sound which was much more pleasant.

2. I cut out the banner with the freezer paper still attached as it is easier to cut. I also left an inch of burlap on top of the banner to fold over and encase the string.

3. I took the freezer paper off.

4. I folded over the top encasing the jute I used to string the banner and stitched the length of each pennant.


                                                          Here is where I hung them...

   Here are the banner images so you can try them yourself... Right click, copy and paste, resize in your favorite publishing program.
Thanks for stopping by!
Linking up to....
lil luna link party button

Tuesday, October 25, 2011

Halloween Decor in a Planter


I had been eyeing up some dead sagebrush for a while, knowing that I wanted to put them in my planters for Halloween. I think it is a perfect creepy looking tree. I just dug a hole in my planter and stuck it in, securing it with a few rocks. I also dressed up a lantern with some typography I made - CLICK HERE to go to that post. I printed the typography on some vellum and adhered it to the front of the lantern. I also found some cob web clip art to put on the other sides.
I haven't figured out how to take night time pictures yet - so please excuse the way the pic looks - I lit the lantern up using glow sticks. I would have put cob webs or something in the sagebrush, but we live in a very windy area so things like that don't work for me. 

Thanks for stopping by!

Linking up to...

Sunday, October 23, 2011

Italian Dinner Gift Basket


I was blown away by the gift my niece gave me for my birthday. She went to a lot of work to make it, and it was right up my alley with a theme to it. She made me an Italian dinner gift basket. Here is what she did....


She made home made tomato sauce in the crock pot. Then she put it in a nice jar with the hand written recipe on how to make it. 


My niece also made  Italian seasoning. She put it in an adorable jar, again with the recipe written out. 

Included in the gift basket was some gourmet pasta, four Italian style place mats, and some adorable Italian flags that my niece made. The dinner was very yummy. All I had to add was some hamburger and parmesan and I was set!

Here are some pictures of my creative, gourmet chef niece putting the gift together. I feel like the luckiest Auntie in the world!

Thank you so much kiddo - your gift was awesome!!!


Friday, October 21, 2011

Halloween Typography


I made this Halloween typography for an insert to a lantern. Stay tuned to see the lantern within the next couple of days. If you would like to use this image for personal use - right click - copy and then paste to your favorite imaging program. Resize as desired. 

Thanks for stopping by!