Saturday, April 30, 2011

Carpet Scrap Transformation - Door Mat Tutorial


 I am so excited about this project! I wanted to join in on the April Ucreate "Create With Me" challenge, which was to paint a rug. I didn't want to buy a rug to paint as I didn't need one - so I wasn't expecting to  partake in this challenge. Then one day I walked by my back door and saw this....


...and a light bulb went on. This is an old carpet scrap that came with our house when we bought it. I don't like throwing things away so it got stuck at the back door. This challenge was just what I needed to come out of my creative shell and do something I have never done before. This carpet scrap was getting a transformation. 

Here is what I did:
1) Prep the carpet: I washed the mat as best I could with a carpet cleaner. After it was dry I vacuumed it. 


2) Cut the carpet: I cut the carpet into a crescent shape. I drew the lines on the back and cut with an exacto knife and scissors. 

3) Paint: After a little bit of reading up on how to paint a carpet, I decided to buy latex paint. This little can was about $5 and I really didn't use much from the can. I stirred the paint with a popsicle stick and painted with an art brush. Latex washed up easily with warm water and soap. I used the carpet scraps to practice painting on to see how the paint went on and what I was going to paint.


I free handed painting on a silhouette of grasses. My inspiration was a stamp I saw in a Stampin Up catalog. I painted a black frame around the whole carpet.

4) Finish Edge: I sewed on an edge to finish the carpet. This took a LONG time. I found the biggest needle in my supplies - this was in my great grandmothers sewing kit. I used jute for the thread. I hammered the needle through the carpet - making sure I had the a double layer of scrap carpet underneath to save my floor. I had to start a new thread once in a while so each time I needed new thread I would double knot it on the bottom of the mat and cut off the excess jute. 


Four hockey games later, two of them overtime games,  I finished the edge of my mat. 

I am so excited about this transformation! My husband likes it so much he wants it at the front door.
Thanks for stopping by!

Linking up to....
The Stories of A2Z
Metamorphosis Monday
Sisters of the Wild West

Tip Junkie handmade projectsUndertheTableandDreaming 


A Marvelous Mess

Friday, April 29, 2011

What You Mean to Me - Deluxe Mother's Day Card


These cards are actually called envelope albums. I made an album for my mom for her birthday (pictured above) and I made an album for my mother in-law for Mother's Day (pictured below). I can't say enough about how well these cards went over. What mother doesn't want in writing how her child feels about her?

I have a tutorial on how to make these HERE on a post called - Gift Idea for Dad.


Fill your album with pictures, quotes, memories and feelings. The picture above is one of the pocket pull outs I made. 


A picture that I didn't put in the tutorial was the envelopes and how they went together. I used three envelopes for my album, you can use more. Glue the flap to the back of the other envelope to make the album. Basically, you will cover this with paper, including making pages for the pockets. 


Here is a picture of an album (the one I gave my husband for an anniversary card) to give you an idea of how it is laid out. The top picture is the pocket side up - and the bottom picture is the pocket side down. 
The "pocket side up" pages, I added little pockets with a quote on each pocket, and then a tag inside each pocket that included memories, compliments, and heartfelt thanks. 


And when it is all folded this is what it looks like.

Here is a PDF file of the Mother related quotes I used in the album...

Mother Quotes

I hope this gives you some inspiration for Mother's Day.
Thanks for stopping by!

Linked up to


Thursday, April 28, 2011

Mother's Day Gift Idea: Woodsies Flower in Pot


I think the cutest little gift my daughter made for her grandmother's was a little woodsies flower. This is the only pic I have of it so it is difficult to see - but the paper piecing flower on this scrapbook page gives you kind of the idea.  The supplies are:
woodsies flower
woodsies leaf shapes
small woodsies heart (optional)
popsicle stick
paint
permanent marker
plaster of paris
small clay flower pot
tacky glue
moss 

Directions:
1. Paint the flower pot desired colors. We painted the brim white and the base striped green and light green. It sort of looked like watermelon colors.
2. Paint the woodsies desired colors. 
3. Draw on flower face with a sharpie.  Outline the leaves and stem with dotted lines if desired. 
4. Mix plaster of paris according to package directions and pour in clay pot. Insert popsicle stick, making sure to leave enough of the stick above to glue on leaves and flowers. Hold until set or prop upright with books or something so it stays centered.
5. Glue flower together. 
6. On the front of the flower pot write "I heart grandma"or whoever you are giving it to. 
I like the look of a tiny heart woodsie for the heart. 
7. Put moss on top of plaster in pot. Glue to secure. 


And there you have it. A cute little gift that the little ones can help make. 

Linked up to....


Childmade

Wednesday, April 27, 2011

Homemade Gift For Mom Idea: Salad Gift Basket With Recipe Book


I like making homemade gifts for Mother's Day and maybe it's because I like receiving gifts that are made from the heart. This was a Mother's Day gift I gave out in 2009. I made three salad gift baskets.


This is a terrible picture but it is the only one I have of the gift from 2009. Inside is a salad bowl, salad tongs and the salad recipe book, all put together like a gift basket. I wrapped the bowl in a tea towel and secured it with a pretty ribbon.

I loved the idea of recipe books with a specific category to organize recipes. I made one of these for myself and one for my daughter too, five altogether. When my daughter moves out she will have a collection of recipes, although I should hold back a few favorites so she has an excuse to call mom.

It is really handy to have all the salad recipes that I like in one spot. For 2010 I made a "Sweets" cookbook, and again, it is very handy to have all my favorite sweets recipes compiled.


The recipe book is made from a photo album I purchased from a $ Store. I thought it would be very handy to have a surface to clean, and the plastic casing works perfect. The pockets are a perfect size for a recipe card, especially if you print the recipe cards out picture size. The picture above is from the inside cover of the recipe book.  Don't you just love the quote in the picture above?  

Here are links to two of my recipe cards that can be printed out for this cook book:


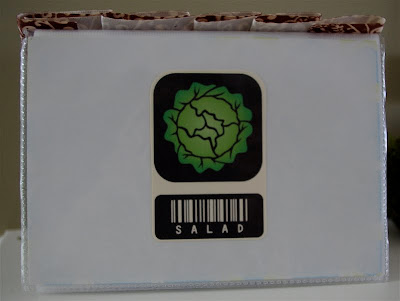
Here is the back of the album. I found this clip art online and thought it was very cute.
I put a few salad recipes inside and left the rest of the pages for the gift recipients to fill. 

And there you have it. One of my homemade gifts for mom ideas.

Linked up to...


Monday, April 25, 2011

Leftover Turkey Idea - Turkey Burgers


Is ground turkey ridiculously priced where you live? I have never purchased ground turkey - but I did look into buying it when I saw some turkey burgers on the Martha Stewart website that looked absolutely delicious. I was not willing to pay almost $7.00 a pound - but I got creative and decided to try it with leftover turkey. I was not expecting much from these burgers to tell you the truth - but I was so excited with how well they turned out. They were definitely yummy! Here is how I did it....

Basically, I made these burgers like you would with hamburger.


I crushed some crackers in my food processor. I use crackers instead of bread crumbs because I never have bread crumbs.


Then I took some turkey and put it in the food processor. This is a picture of turkey legs that I froze. I wanted to use brown turkey meat because it is moist. I haven't tried these burgers with white meat.


After it is well ground make it like you would with beef burgers. Add an egg, salt and pepper. You can add chopped onions and whatever ingredients you desire. I also added 1 tsp. of chili powder and a little bit of mayo so they mixture was moist.


Shape into patties and cook in a frying pan. I have not tried these on a barbecue. Pretty much the size you make these when you shape them...


...will be the size they are when fully cooked. I cooked them until golden brown on each side.


These are fabulous with melted cheese, oh yeah, and cranberry jalepeno jelly. If you have monterey jack cheese use that, but I have used cheddar and that is good too.

For more leftover turkey recipes, CLICK HERE!

Thanks for stopping by!
Linking up to....
Santa's Gift Shoppe Blog Hop
Whassup Wednesday
Tip Junkie handmade projects


lil luna link party button


Card Idea For Mom


I made this card for my Mother-in-laws birthday. This would also work for a Mother's Day card too, so I thought I would share it as my first mother's day post. I printed out a frame that I found on the Graphics Fairy blog (click HERE). I added the "beautiful to me" words and printed it out on kraft paper. After cutting out the card to the desired size, rounding the corners and inking the edges, I tied a bow and glued it in the middle of the frame along with a rose (purchased from a $ store)  that I flattened a bit with my fingers a bit so I could glue a pearl in the middle (the pearl was taken from a necklace I am repurposing). I adhered a strip of lace to the card with double sided tape and then adhered the "beautiful to me"card to the base card.

Thanks for stopping by and stay tuned for more Mother's Day ideas.....

Linking up to...


The Graphics Fairy
Chocolate Drool and Kisseslil luna link party button

Friday, April 22, 2011

Banana Wheat Germ Muffins with Chocolate Chips


I got this recipe off my wheat germ package by Rogers Foods. The chocolate is my addition because I think every banana muffin needs chocolate. These are a family favorite and I like that there are some healthy ingredients in there. You should definitely give them a try.

Here is the recipe....

1 1/2 cups All Purpose Flour
1 cup wheat germ
1/2 cup brown sugar
1 tsp baking powder
1 tsp baking soda
1/2 tsp salt
1 cup mashed banana  (appoximately 3)
1/2 cup milk
2 tsp. lemon juice
1/4 cup vegetable oil
2 eggs, beaten
1 cup chocolate chips

Combine flour, wheat germ, brown sugar,, baking powder, baking soda and salt; stir well. In another bowl blend banana, milk, lemon juice, vegetable oil and eggs. Add the banana mixture to the dry ingredients and stir until just blended. Spoon into prepared muffin tins and bake 20-25 minutes.

Here is the recipe card....


Thanks for stopping by!

Linking to...


Thursday, April 21, 2011

Corner Shelving Unit Made from a Door


This corner shelf has been a long time in the making, or should I say dreaming, because it didn't take that long to actually make. I got the idea from a blog called Little Birdie Secrets - find the inspiration by clicking HERE. On this blog is pictured a few ideas of what can been done with antique doors. There were no instructions on how to make it because it was a picture of what her friend had found, but that is part of the fun of creating. I bookmarked the picture because I HAD to do this. I told my hubby he could make me this for Christmas but he couldn't find a door. On New Year's I was at my mom's house and scored this door. I am so excited because this is a door that is from the house I grew up in, AND the house my dad grew up in, which will be 100 years old next year.

My hubby built the shelving unit for me (thank you sweetie!!). All I had to do was sanding and staining. I didn't get pictures of the process because he did it while I was at work but I will try my best to explain what he did.


Here is the door on the operating table. My hubby was concerned about the height of the door, so he cut off the top panel. He save the wood around the panel to finish the shelves off with the same wood. My hubby was also concerned about the door splitting when he cut it so he cut it in half with a hand saw. A lot of love and hard work went into this.

When the door was in half he screwed a 2x2 to one of the halves, and then put the other half at the 90 degree angle and screwed that to the 2x2. You can see the 2x2 through the front. Then he cut the shelves accordingly, put the old wood on the fronts and his job was done (this job did take most of the day).  He put the bottom shelf right at the floor to give the unit stability.

I just love the door knob so it had to stay on. I decided to keep the original paint job too as it gave it character. I painted in the grooves where you could see the 2x2. I did a pretty good job mixing the colors to match the turquoise. I sanded and then stained the whole unit with Watco oil. I love the water stains and the whole rustic look of this door. I remember this door and how it was painted really bothered me when I was a teenager. I absolutely love it now!


I am not quite sure what I am putting on this unit, but I like the lantern of my grandfathers and the old Bibles that are my great grandmothers. 


I was cleaning up from the job and I put the leftover panel in the "to save" pile. My hubby said that is was junk and to throw it out. I saved this little beauty and recycled that too!
Click HERE to see what I did with it.

I am keeping my eye open for another door. 
Thanks for stopping by!

I am linking up to...

UndertheTableandDreamingVisit thecsiproject.com