Thursday, March 31, 2011

Easter Egg Pillow


There was a pillow challenge over at the CSI project and I got this crazy idea to make an Easter Egg pillow. I have a felt book called "Warm Fuzzies" by Betz White. There was a bag in that book that reminded me of an Easter egg for some reason (although it was called a rainbow bag). I thought the techniques she used for that bag project would be neat to try making a pillow. So here is how I made it:

Since I have this book, I have been collecting wool garments from thrift stores. I gathered my colors that I wanted to use.


I drew an egg shape on a large piece of paper for a pattern. Then I cut out two pieces of fabric. This can be cotton or whatever you find suitable.


I cut out strips of wool - laid the strips on the egg shaped fabric - and then made waves in the wool. There was a piece of fabric with hand sewn flowers in the collar of the blue sweater and it was a perfect shape to put on top of my egg.


I pinned all the wool pieces to the front egg shaped fabric.


Then I stitched all of them to the egg shaped fabric.


After I was done stitching all the waves to the egg, I flipped the egg piece over and trimmed the wool pieces. After this I pinned right sides together of the egg shape fabric and stitched around the egg leaving an opening at the bottom.


I turned the egg right side out, filled it with stuffing and sewed the opening closed.


And there it is. I put bunnies beside this egg for this picture, but I am going to sew a couple smaller egg pillows in solid colors. I made this pillow from wool but fleece or felt would work good too.

Thanks for stopping by!

Monday, March 28, 2011

April Fool's - Dinner Idea


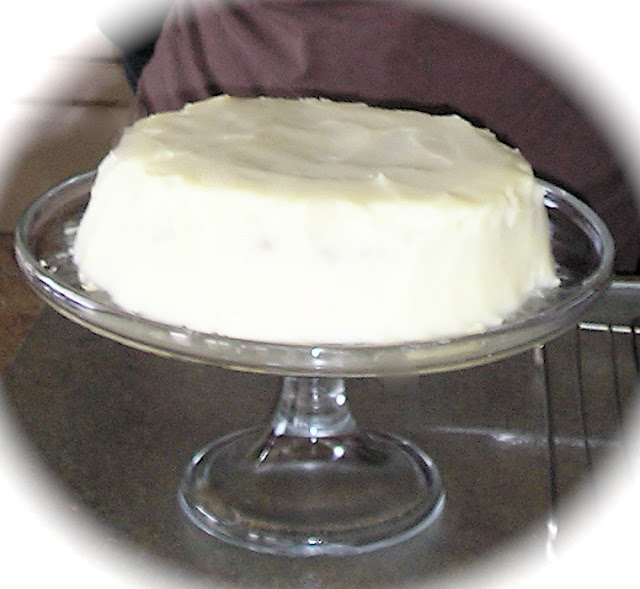
This has been the extent of my April Fool's celebration the last couple of years - in fact this is the picture of my first April Fool's theme meal in 2009. I made a meat loaf and iced it with mashed potatoes and put it on a cake stand. I took a regular meat loaf recipe and tweaked it a bit by adding frozen spinach (I freeze spinach in a ziploc bag and add a handful or two to different recipes) and grated parmesan cheese. This meat loaf was so good in the cake form that when I made this same meat loaf again it didn't taste as good. After I iced the meatloaf with potatoes I put it in the oven to warm up some more so if you do this make sure your cake stand is oven safe because the meat loaf will get cold while you decorate it. This year I am going to pipe on some mashed potatoes to make it look more like a decorated cake, and I am thinking I might try radish roses as well.


Thanks for looking!

Linked up to.....


Tip Junkie handmade projects
Making


Friday, March 25, 2011

Paper Birthday Cake with Homemade Cake Stand


I saw something like this but on the "kiddie" side in a recycle book - and knew I wanted to make some for special birthdays. The original idea were covered toilet paper rolls, and they were favors for a child's birthday party. I thought this was a fabulous idea - but I wanted to to my own version.


I purchased a candlestick and a plate at a $ store - total cost $3. Glue together with epoxy glue or your favorite glue.

Super nice for $3 hey?
Now for the paper cake....


Supplies: paper, ribbon, glue, twist ties.
Cut 4 -  8 1/2 x11 sheets of patterned paper in half - then cut the length to be 6 1/4 inches.
Cut two flames shapes from ribbon. You will also need ribbon to tie around the candles.
Cut two 2 in circles for each candle you make.


Hot glue end of paper and glue together to make a tube. I made seven tubes.


Glue your flames together with a twist tie in the middle. Instead of a twist tie you could use chenille stems or wire. I pinched the bottoms of the flame together to give it some depth. Poke a hole in the middle of circle. Insert twist tie and adhere to bottom of circle. Trim if necessary. Snip slits around the circle.


For each candle, make a bottom by gluing a strip of paper to a 2 inch circle and applying glue to the outside of the paper strips and inserting it in the tube - adhering it to the sides using a pen or pencil to help the papers find the sides of the tube. Apply a little glue along the bottom of the tube and circle. 


Your candle will look something like this. The top pops on and off.


Tie your candles together with desired ribbon. I used the same ribbon as I made my flames out of. Put the gifts in the tubes, filling the tube with tissue. You can put in cosmetics, craft supplies, etc. Lots of good things come in small packages. Put the lids on after you put your gifts in. the tissue should keep the lids from falling through the candle but the lids will be tight - that is why you put slits in them.

Tape a paper doily to the cake stand. Tape the bottom of candles and stick them on the cake stand.
Such a unique and sweet way to present a gift. The recipient is guaranteed to feel special. 
Thanks for looking!

Linked up to....


Visit thecsiproject.com


lil luna link party button


AND Designer Garden VIP Party CLICK HERE


Thursday, March 24, 2011

Chocolate Oatmeal Cookies Recipe


These cookies are not to be confused with the stove top chocolate oatmeal cookies (find that recipe by clicking HERE!
These are baked in the oven and YES they are delicious. How can double chocolate not be? Every time I make these cookies I do a double take at the 1 TABLESPOON of baking powder it has in the recipe. That is what the recipe says and the cookies don't turn out weird so I keep putting that amount in there. Here is the recipe....

1 cup butter   1 1/2 cups white sugar
1 tbsp. baking powder   1/2 tsp baking soda
 3 oz.unsweetened chocolate melted and cooled
 1 egg   1 tsp vanilla    1 1/4 cups flour   1 1/2 cups quick cooking rolled oats   
 1 cup chocolate chips    
Pre-heat oven to 375. In a large mixing bowl beat butter on med-high for 30 seconds. Add sugar, baking powder and soda. Beat until combined, scraping sides of bowl occasionally. Beat in melted chocolate, egg and vanilla until combined. Beat in as much of the flour as you can with the mixer. Stir in any remaining flour, oats and chocolate chips.
Drop dough by slightly rounded teaspoons about 3 inches apart onto an ungreased cookie sheet. Bake for 8-10 minutes or until edges are firm. Transfer to wire rack to cool. 
Here is the recipe card....
Thanks for stopping by!


HouseofHepworths

Tuesday, March 22, 2011

Wreath Made From Sagebrush - Tutorial


Here is the wreath I made for the 'SPRING WREATH' challenge on Ucreate. Here are the rules:


1. Use this month’s tutorial

2.Take a photo of your finished wreath.

3. Email photo to ucreatecrafts@gmail.com and title it “Create With Me”. Make sure to include your name and/or link you want displayed!

5. Due date for photos is March 30th.


So I checked out the tutorial from the Stone Gable blog - thought about it for a while- and came up with this idea. 
The tutorial uses a purchased twiggy willow wreath - but I decided to make my own twiggy wreath out of something very abundant in my neck of the woods - SAGEBRUSH. Here is how I made my own twiggy wreath...

I picked about two grocery bags full of sagebrush - cutting the stems approximately 12 inches long - with some a little smaller and some a little bigger to get a variety of sizes.


I took an 'undesirable' hanger apart and secured the ends together to make a wire wreath.


I made sure it would fit with the grapevine wreath that I am going to attach it to later.


I grouped together 2 or 3 of the sagebrush stems - usually a large, medium and small size depending on the thickness of the stems . Secure bunch together with wire leaving enough wire to wrap bunch around the coat hanger. I used silver light gauge wire that you can buy at $ stores - but of course floral wire is better because it is green. I figured the sagebrush had a silver tinge to it so it would be okay. If I had floral wire on hand I would have used that. 


Position bunch on coat hanger wrapping it several times around - securing stems to the wire wreath (coat hanger). 


Cut wire if needed or fold it under with pliers. I used pliers to wrap wire around the wreath as I found I got the bunch tighter with the pliers than without them.  
Continue making bunches  and securing them on the wire wreath - overlapping the previous bunch until the wreath is covered. Some spots I had to secure the top of the bunches to the bottom of the previous bunch - but I did that after I secured that bunch to the wreath. 
I had made a eucalyptus wreath years ago, and I used this technique - way cheaper than buying one - and it is an education when you make it.

When you have attached twiggy bunches all the way around the wreath -  attach your twiggy wreath to the grapevine wreath. The tutorial on the Stone Gable blog said to secure the wreath at 12:00 , 3:00, 6:00 and 9:00.  Use a long piece of wire (about 12" seems to by my magic measurement).
Secure the ends making sure there are no sharp scratchy edges.

To complete my wreath I HOT glued on some artificial roses and some dried hydrangeas. 


I love how my wreath looks. I live right beside a grasslands government park and it is loaded with sagebrush - so my wreath fits right in with the beautiful natural scenery around us.
What natural plants/twigs do you have around you?? I am sure there are many different and creative wreaths that can be made by making your own twiggy ____________ (fill in the blank) wreath.

Thanks for looking!


Linked up to....
Visit thecsiproject.com


Monday, March 21, 2011

Easter Decorations - Pastel Flower Topiary Tree


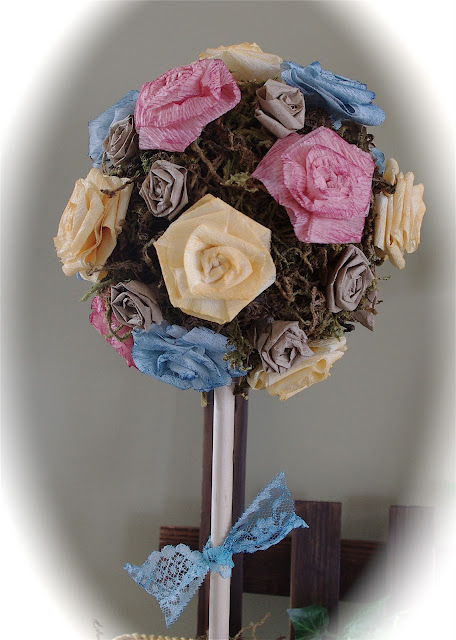
Here is the start of my Easter decorations. I made some streamer flowers (click HERE for the tutorial)
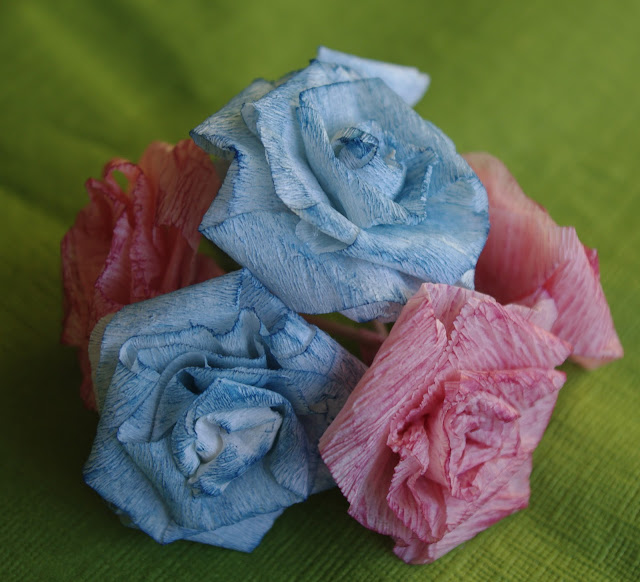
 which I made custom pastel/Easter colored flowers by inking the streamers. I attached each flower on to a toothpick, then I inserted the flowers here and there on a moss covered styrofoam ball. I custom colored the lace on the dowel by inking cream colored lace with the same blue that used to make my streamer flowers blue. Here is a close up picture....


I made smaller flowers out of brown paper tissue. This was tissue that a $ store used to wrap some breakables I bought. I cut strips about an inch wide and 12 inches long and used the same technique to make them as the streamer flowers. They turned out really good. Now I am off to make a second one.

Thanks for looking!


Friday, March 18, 2011

Make Your Own Spring - Streamer Flower Tutorial


Spring seems to be taking an extremely long time to show up in my area - but there are flowers blooming inside!

I am addicted to making crepe paper flowers from streamers. I had a brain wave for my Easter mantel that included some crepe paper flowers - HOWEVER - even with all the streamer colors available - I couldn't find the colors I wanted so I made my own colors.  I am SO excited about this and I had to share because it is such an easy technique that gives amazing results. So here is how I made my own spring....

Streamer Flower Tutorial

Supplies

crepe paper streamer in desired color
ink
glue
glue gun
scissors


For an approximate 2" flower - use about 24 inches of crepe paper. Rub with desired scrapbooking ink.


Here is my white streamer after I inked it.


Here is my light pink streamer after I inked it.


Fold streamer in half with inked side out.


Gently tie a knot close to one of the ends. Leave a little tail to hold on to while gluing.


Find a nice looking part of the knot to be the center of your flower. Glue the first bit of streamer onto the knot to hold the center in place. The fold in the streamer at this point is on the bottom.

Wrap the streamer around the center a little more and glue in place. Now start making half twists in the crepe paper - glue- turn flower a bit - half twist - glue - turn etc. Use the tail of the flower to hold on to (see it between my fingers?) Keep turning the flower, half twisting the crepe paper and gluing until the flower is the desired size or you run out of crepe paper.


This picture shows the end of the twisting, gluing, turning stage. Put the final dab of glue on the flower. I keep the tail of the flower on as I have used this to adhere the flower to a toothpick. Trim the tail if you need it.


And there you have it. Isn't it pretty?


Just some final touches - I dab a bit more of the ink on the petals to give it more of a textured look.


And why not make all sorts of colors? This color is orange ink on a white streamer.
My first few flowers did not look like flowers - and sometimes I get one that just isn't as nice as some I have made. The point I am making is to try and try and try again. I made some really nice flowers when I studied the roses my husband gave me for Valentine's Day - so looking at the real thing is very helpful.
So go ahead and try it yourself!
Oh yeah - I can't wait to show you what I am making with these flowers. Stay tuned!

Linking up to...


Join  us Saturdays at tatertotsandjello.com for the weekend wrap up
    party!