Monday, January 31, 2011

Pattern Tissue Paper Topiary Tree


I have been loving all the topiary trees that I've seen around blog land. I wanted to do something a little different, so I made mine with pattern tissue paper. Something I learned about pattern tissue paper is they are not the same color, so if you make two  -  you might want to check on the shades. I had a bag of patterns that I was going to give to the second hand store. My trash is becoming my treasure. I love how these turned out. My hubby turned up his nose a little because he said he could see the black pattern lines. To me, that is what gives them character. I love them!

Here is how I made them.....


First, I cut out my pattern in circles. This is time consuming so I did it while I watched the news. I tried cutting them the size of a large cupcake liner, but I also used smaller ones. I pretty much tried to utilize the whole pattern with little waste. Keep in mind that some patterns come with more tissue paper than others, so you might need more than one pattern for a topiary tree. One of my topiary trees used two smaller patterns.  I made sure the next pattern I used was a larger pattern and so I only needed one. 


My experience with topiary trees is they only last so long and the dust collects and they don't look good anymore. I saw this fiskars globe at a discount store and thought I would give it a try instead of a styrofoam ball as it would be versatile in allowing me to change the tree once in a while.


This globe proved to be a little bit of a challenge. It didn't come with instructions, but I know it is used for fresh flower topiaries. I am thinking you are supposed to add floral foam in the middle. I didn't have that at home and I wanted to get going on my project so I experimented. I added some pattern paper to the inside, and I jammed the dowel in one of the openings that was a bit snug. I had to add more pattern paper through the holes to get the dowel to stay in the position that I wanted, and I wedged some pattern paper around the dowel at the bottom to secure it. 


Adding the tissue paper was fun and fast. With a styrofoam ball, the gluing seems to take forever (can you tell I am impatient?) Place the tissue around a blunt object (I used the end of a paint brush) and stick it in the globe, far enough so that it is secure. I did have some come out on me, but once it is all filled they hold themselves in. Please keep in mind that this method is for temporary decor with the idea of changing it up often. If you are going to keep the topiary around long enough that you have to dust it, I suggest the gluing on a styrofoam ball method. 

Once I had the globe half done, I put it in the pot. I have used foam, plaster of paris and dirt with rocks. Plaster of paris works the best, but that is pretty much the end of the possibilities for that pot. 


When the topiary was filled, it was uneven here and there. I loved the next part.....


I took a wooden skewer and poked the tissue paper in until the globe looked even.
This was a fun project, and I learned a lot about pattern paper. I am going to look for more projects to make with it. Here are the topiary trees on my mantel...


Click HERE to go to my mantel post. 
Thanks for looking!

I have linked up to a trash to treasure linky party.
Go check it out!


Photobucket

Friday, January 28, 2011

Valentine Sweets Medley

Here are some sweets you can try out for Valentines day. 
For the CHOCOLATE DIPPED STRAWBERRY CHEESECAKE recipe
For the Candy Cane Hershey Kiss Sugar Cookie recipe, 
For the PEANUT BUTTER BLOSSOMS recipe,
For the Chocolate Mousse-Brownie Trifle recipe,
Thanks for looking and happy baking!

This post is linked up to this linky party...


Iron Violet Designs


Thursday, January 27, 2011

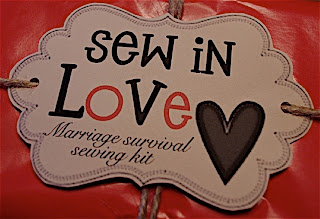
Marriage Survival Tool Kit


I had a lot of fun putting this Marriage Survival Tool Kit together. This was for a wedding gift but the idea could be used for an anniversary, or Valentines gift. I would modify some of the sayings if it was to that special someone rather than to that special couple.
Here is what I put in the Marriage Survival Tool Kit - along with the sayings.....


Tape Measure - Love beyond Measure


Tape - Stick Together


Nails - Build your relationship every day
( I was going to put a hammer with this but the tool box I bought didn't let it fit)


Assorted Household Hardware Accessories
(little things like picture hangers and tacks)-

Remember the big things are the little things


Mini Screwdrivers - If a screw is loose, tighten it


Level - Find balance in your marriage. Love on the level


Glue - Establish a divine bond


And of course a tool kit....

I found some marriage advice to go with all the sayings as well. I printed out tags
(find a copy below) and cut out a tag with the marital advice the same size of the other tags and placed them on the opposite side. 
Here is the marriage advice that went with the tape measure:

“Are you willing to search within yourself for the character required to make Your marriage work? All our relationships follow the contours of life; they have ups and downs. This is why our families provide a critical measure of our character—and the opportunity, again and again to nurture it.”
Stephen R. Covey


Marriage Survival Tool Kit Tags


Marriage Survival Tool Kit Sign
Check out the other Survival Kits I have Made....


Happiness is Homemade - Marriage Survival Kit


Thanks for looking!


Tuesday, January 25, 2011

Valentine Pouch Craft


These are our family Valentine pouches. I quartered a 12 x12 piece of kraft paper to make four squares (I only used three). I used Fancy Pants Vintage Valentines papers for the front of the pouch and the decor in the middle. I cut the front pouch a little smaller than the 6" kraft paper. I punched a half circle out of the middle of the patterned pouch paper. I stitched along the top. Then I stitched the patterned pouch on to the kraft pouch. For the corners I embossed paper with my Cuttlebug using the Fancy Corners embossing plates and I gently sanded over them to distress the paper. Then I added a picture so we could distinguish whose Valentine pouch it is.


On the girl's pouches I added a little more feminine touch with lace trim and pearls.


I have these pouches on our mantel with paper cards, again from Fancy Pants Valentines Vintage paper, so we can write words of appreciation on them for each other and then put the "love" notes in the pouches. I made these last year. I am hoping to get a few years out of these. It will be good to look back at previous Valentines Day words of appreciation and keep up the tradition year to year. 


Check out my Valentines Mantel post by clicking HERE.


Thanks for looking!

This craft is participating at this linky party...


lil luna link party button

Monday, January 24, 2011

Valentines Mantel


For my Valentines mantel I chose neutral colors with a splash of Valentine red here and there. The family tree frame is pretty much a permanent fixture as it is too heavy and too hard to remove - so it needs to be worked around. There is supposed to be a flat screen TV in this little alcove but we did not want a TV in our living room.


One of the items close to my heart on this mantel is a crotchet piece my great grandmother made. I wrapped it around my candle holder. This beautiful work of art has hearts on it, however, I added burlap hearts (that I inked with red) over the crotchet hearts as they were hard to see. I attached the burlap hearts with diamond brads.

Other homemade items on the mantel include family Valentine pouches and pattern paper topiary trees. The next two days I will be posting how I made these. The pattern paper topiary trees were an adventure and a learning experience for sure. 

Thanks for looking!!

I have linked to this linky party.

Valentine%27s+Mantel+Linky.jpg

Check it out by clicking HERE

Saturday, January 22, 2011

Valentine Decor - Love Mirror


I love all the vinyl crafts out there, but I do not have a Silhouette. I don't want to cut vinyl in my Cricut - so to make do with what I have, I made this on my computer and I printed it out on a transparency. I cut it to fit in the frame (with a little to spare to hold it in place in the frame of the mirror). I made a "Believe" transparency for Christmas and decided to do one for Valentines Day.

Here is the love file. You can print it out if you would like (right click/copy/or save file as) or why not try making your own? This would also make a cute tag as well.


This craft is linked up to....


Friday, January 21, 2011

Homemade Paper Lanterns


I originally made these lanterns for a display at Church. They looked totally different then.


I didn't want to throw these lanterns out. I knew they could be used again. The opportunity came when I was decorating for my daughters 15th birthday, which was an Asian theme. I cut a rectangle out of the front, made a vellum insert and added red flowers. I am putting these in my Valentine display, but I am not sure if I will change the vellum. I printed the vellum inserts off my computer and taped them to the inside of the lantern. These can be changed for any season/holiday. I put flameless candles inside the lanterns. The instructions for making the lantern can be found HERE on the Project Wedding website.


Thanks for looking!

I am linking up. See who I link to HERE.