Showing posts with label Halloween. Show all posts

Friday, October 12, 2012

Halloween Peat Pot Kitty


Hello! Welcome to my blog! I bought some peat pots a while back to make some crafts with. This is my first craft - Halloween candy holders. 
Here is what I did:
1. I painted the peat pots black. I cut ears and a little hair and hot glued them to the inside top.
2. I made the eyes out of flat glass marbles. I glued yellow scrapbook paper that I had previously drawn bulging lines on to the back of the marbles. I hot glued the eyes on the pot, and then a mini pom pom for the nose. To offset the weight of the eyes, I glued a flat marble on the inside of the pot - otherwise the candy holders tip.
3. I painted on a mouth and whiskers with a white sharpie fine tipped paint pen.


Now I need to fill them with candy!
Thanks for stopping by!

Linking up to...

Tatertots and Jello

Friday, October 28, 2011

Make Your Own Halloween Plates

I made these Halloween plates by printing on contact paper and adhering it to the bottom of a glass plate.
Here is what I did....

1. I purchased glass plates from the $ Store and washed them. The sticky tag didn't come off nice - so I put some peanut butter on and scrubbed it off.

2. I printed out a circle from my computer and tested on my plate for size - I was lucky the first time - I got a size that worked. It is best if the circle is a little smaller than the flat circle part of the plate.

3. Cut out two pieces of contact paper that will fit over the circle. With one of the cut out contact papers, put double sided tape on the peel off backing and adhere over the printed circle. The plastic side should be facing up to be printed on. I used two varieties of contact paper - one from the $ store and the other from Zellers. The Zellers contact paper was way better quality and not as shiny. Both did work but I definitely liked the matte contact paper.

4. On your computer, copy and paste desired images in the circle - if you use printing reverse it. The images I used were from Graphics Fairy. Click Here to go to the skull - Click Here to go to the Skeleton Man. Put the contact paper sheet through the printer in a manner that the image will print on the contact paper.  Do not touch image as it is like a dry erase board and the ink will smear.


5. Take the pre-cut contact paper - peel off the back and stick it on top of the printed contact paper. You might get some bubbles - but most if not all of them can be worked out by pressing them firmly.

6. Remove the contact paper from the printer paper. Cut around circle.

7. Remove backing.

8. Apply to plate. If you have the good quality contact paper, it can be removed for washing and put on again after. Stick it on the fridge or window until dishes are washed and re-apply if desired. The cheaper contact paper didn't work so well taking it off and using it again.

So there you have it - make your own custom Halloween plates!

Check out some of my other Halloween posts...


Thanks for stopping by!
Linking up to...


Halloween Food Ideas 2011


I saw this CUTE idea and HAD to do it. Please go look at the blog where I got this idea from. It is called "The Smith Family" blog. She has a whole Halloween party laid out for you to look at - FABULOUS. I liked this idea because it was super easy and super cute. CLICK HERE to go to the post.
Sandwiches are easy to make - the only extra touch is printing out the clip art, cutting it out and adhering the legs and hats to toothpicks. 
Here are the links to the clip I used - LEGS CLICK HERE   HATS CLICK HERE

I saw this idea on BHG. They had a refried bean dip with lettuce for grass. I made a black bean dip RECIPE HERE, and made guacamole for the grass. The guacamole helped hold up the tree and grave stones. Cut out shapes from tortillas, brush with oil, cook until golden brown. 

Also, check out the gingerbread skeleton men I made. Click HERE to go to the post.

Thanks for stopping by!

Linking up to...


Thursday, October 27, 2011

Gingerbread Skeleton Man Cookies


I saw this really good idea on Pinterest - gingerbread men that were iced like skeletons. Gingerbread cookies are one of my favorite cookies. The secret I think to good gingerbread is to not cook them that long. The longest time I leave my cookies in the oven for is six minutes - but it does depend on how thick they are. Click here for my gingerbread cookie recipe - and the royal icing recipe.

My icing is something that needs to be improved upon - but I basically strived to make a bone shape in each arm and leg - an anchor like piping for the ribs, and then the skull. My icing could have used a bit more sugar to thicken as it spread a bit after I piped it - but I got the hang of icing after a while. The first few were really creepy looking - but hey - they are for Halloween!

Thanks for stopping by!!!

Wednesday, October 26, 2011

Halloween Burlap Banner

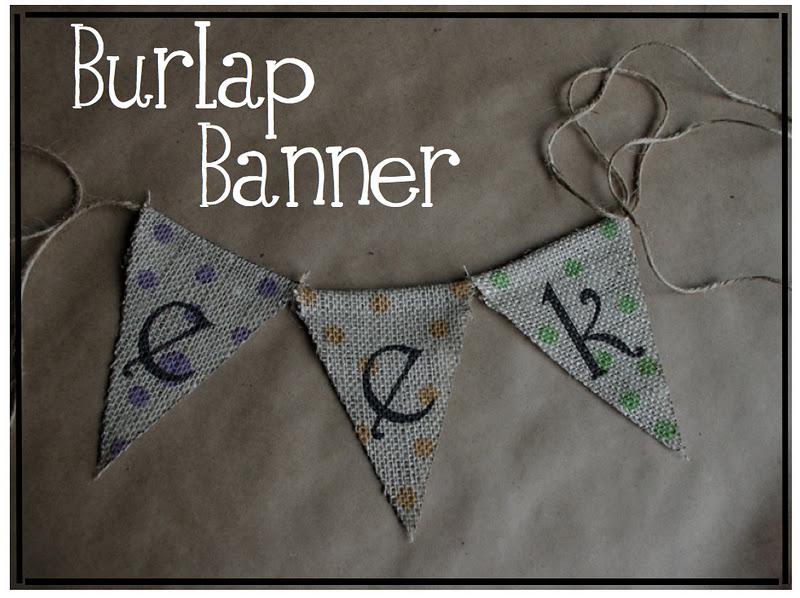
I have been admiring the burlap banners that I have been seeing around - and I thought I would make a couple of small banners. I recently tried printing on burlap with the Thanksgiving Block project - and it was so much fun - I wanted to run burlap through my printer again but this time using a bit of color.
       I made an "eek" banner and a  "boo" banner.
This is how I did it....

1. I made the graphics on my computer (I have the images below so you can use these for personal use). I ironed burlap to freezer paper and then ran it through my printer. Last time I don't think I ironed the freezer paper to the burlap long enough - when it went through my computer it made a freeky sound - but it still worked - this time it didn't make the sound which was much more pleasant.

2. I cut out the banner with the freezer paper still attached as it is easier to cut. I also left an inch of burlap on top of the banner to fold over and encase the string.

3. I took the freezer paper off.

4. I folded over the top encasing the jute I used to string the banner and stitched the length of each pennant.


                                                          Here is where I hung them...

   Here are the banner images so you can try them yourself... Right click, copy and paste, resize in your favorite publishing program.
Thanks for stopping by!
Linking up to....
lil luna link party button

Friday, October 21, 2011

Halloween Typography


I made this Halloween typography for an insert to a lantern. Stay tuned to see the lantern within the next couple of days. If you would like to use this image for personal use - right click - copy and then paste to your favorite imaging program. Resize as desired. 

Thanks for stopping by!

Wednesday, October 19, 2011

Trick or Treat Wood Blocks


This is the first of my Halloween decorating this year. I started with the blocks that I made for Thanksgiving - that I was planning on switching up for different seasons...


These Thanksgiving blocks have a quote printed on burlap - CLICK HERE to go to that post.

For the Halloween blocks, I used a batty dictionary page for my background that I found on Graphics Fairy.  I tinted it orange on my iphoto program. The words "trick" and "treat" were printed out using the font "Pieces of Eight". The word "or" is printed out using the font, "Rage".
After printing out the sheets, I cut the paper to fit each block, I stamped some scrolls randomly on the paper, and I inked the edges with black. I tacked the paper on the blocks with black upholstery tacks.  

I got the idea for these blocks from the Horton's of Tipton site. I cannot find that exact post now to link to that - but I suggest you check out this site as it has some amazing stuff.

Thanks for stopping by!

Linking up to...

lil luna link party button


Wednesday, October 12, 2011

Toy Story Halloween Costume


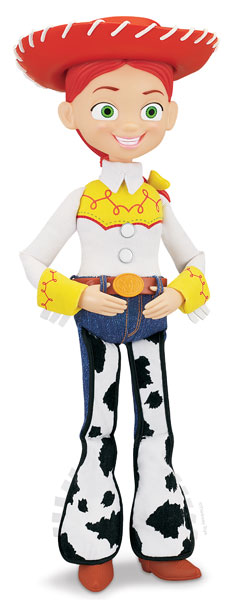
I do not make Halloween costumes for my daughter anymore, but I thought I would share my favorite costume that I made her. My daughter loved Jessie and Bullseye from Toy Story once upon a time - and we had watched a neat segment on one of our favorite shows, Art Attack, on how to make box horses. Although I did not know how to draw at all, I set out to make this outfit. I used pictures to be my guide, and I think I did pretty good considering my drawing skills are not very good. 
I couldn't find the Art Attack tutorial on how to make a cardboard horse - but I found one on ehow. CLICK HERE to go to it.

I used to make and sell baby western wear, so making the western shirt for me was reasonably easy. One could easily get a white shirt from a second hand store and add on the yellow yoke and cuffs, with red braid. I found the hat at Value Village, and I bought some cheap cow material from a fabric store and baste stitched it to a pair of her jeans - to remove later. I borrowed a pair of cowboy boots - but warning - cowboy boots are not comfortable - if I did this again I would go with runners all the way.
I did braid my daughters hair. 


Other costumes my daughter wore:

 Little Red Riding Hood
 Lion
  Princess
Elephant
 bunny
 lady bug
skunk
wounded dirt biker

This year she is dressing up as Jessie from Pokemon - and she is going to put a pikachu stuffie in a butterfly net. She might dress her dog up as James. Too funny.

Happy Costume Making!!

Linking up to...


Friday, November 12, 2010

Halloween Scrapbook Page Idea

I scrapbooked these pages last year. I made the black journaling strips on my computer. I put a black journaling box on the page and typed out the words with different fonts and colors. The big "boo" and "eek" were masked on using Tim Holtz font masks. I love making the 8 1/2 x11 scrapbooks, so I like to print a lot of my pictures half the size. The Kodak printers have an option of making mini prints. I love getting two or four pictures with each mini print.


Saturday, October 30, 2010

Halloween Treat Bags

I have made some treat bags that are fairly easy. I don't make many of these, I just want to give them to my daughters babysitting crew and our neighbors kids.

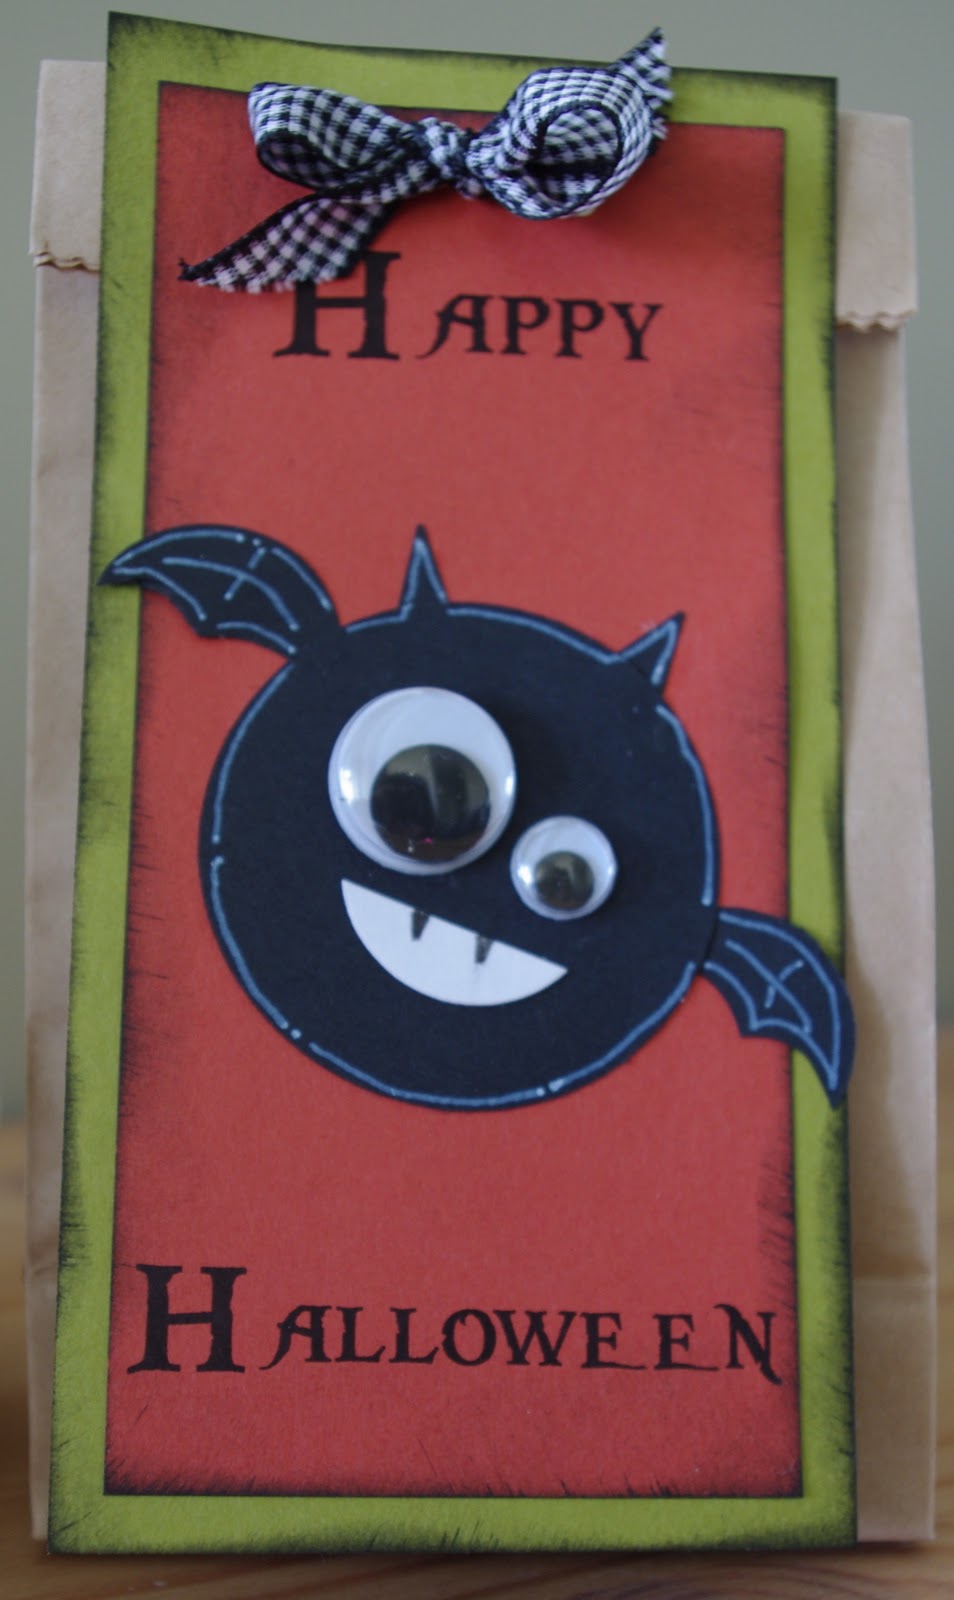
I typed out a page with six "happy halloween" sayings on it.

Halloween Printout

The first bat is made from punching three circles, a large black one,  a small black one, and a small white one. The small circle I cut in half and then cut out dips to make bat wings. The small white circle I cut in half for the mouth. I am thinking it would have been cool to do a green or purple mouth - next time I guess. Then I cut out two tiny triangles for the ears. For the eyes, I used two different sized googly eyes. I inked the edges of the tag, glued everything together, including a green background to frame the tag, poked two holes in the top of the bag and the tag, and inserted a ribbon to tie it all together.
The second bat I hand drew. You can download an outline here....

Bat Outline Printout

The bat that has the square around it is the size I used for the tag. Cut the bat size out that you desire, and draw around the outline with a white pencil crayon on black card stock. Cut the bat out leaving a bit of black outline (don't cut on the lines). Draw a face. Cut out a couple clouds and ink, punch a circle for the moon. Glue as desired. I adhered the bat using pop dots. Next time I will ink yellow around the moon. I completed the bag the same as the first one.


The next tag I did I punched three circles the same size. I used a creepy green color for my main background and the two other colors I wanted to be my ground. I ripped the ground circles at different heights. I inked around the edges and glued them together. I pasted a cricut tree crooked on the round tag in between the ground layers. I made a tiny ghost and drew on gravestones. I used a white felt pen to dot on the gravestones. One was big enough to write "RIP".  I adhered the ghost on with pop dots. I glued on a purple border and I finished the bag the same as the first one.

Happy Halloween Printout

Happy Halloween

Bat Outline Printout

Bat Outline


Friday, October 29, 2010

Halloween Dinner

We did a special Halloween theme dinner during the week.  This is what was served.....
"Guacamoldy" - This was a cute idea. I found this idea on the Martha Stewart website.
"Eyeballs" - I needed to be a good girl and serve a vegetable with this meal so I opted for carrot eyeballs. I found this on the Family Fun website.
The "fingers" idea was also from the Family Fun website. These were super easy to do and looked so much like fingers. Although these fingers looked fantastic, if I do another Halloween meal I would choose to make chicken fingers. I saw a recipe on the BHG website. The "shriveled brains" I found on the Martha Stewart website. They were super easy too and very tasty.
"Worms in dirt". I found this idea on the Martha Stewart website as well, but the worms were just in mashed black beans. I wanted to make a black bean dip my family likes. The worms are hot dogs, sliced and boiled in water until they are curly. I quartered my hot dogs, but I would cut them even finer to make smaller worms.
We also had grape juice that was in a mason jar with a label. We had red jello, but I didn't do anything fancy with that. I meant to make cupcakes but I ran out of time.
I printed out labels. I found a cool frame from Vintage Vectors. I inked around the edges with my tea dye ink. I didn't take a picture of the whole table (I am kicking myself for that), but my homemade cake stand made an awesome display for some of the food.

Saturday, October 23, 2010

Outdoor Halloween Decor - Wood Block Tutorial

I wanted to make some wood blocks for Halloween this year. I wanted something different from the regular "boo" so I decided to do "eek!"
Here's how I made the blocks....
I picked out 3 2 X10's from my scrap wood pile, and one 2x6. My pieces were all different sizes, the tallest being 12 inches. I sanded each block on all sides with a power sander.
Then I took a rag and wiped off all the dust.
Next, I painted the blocks. I used orange, lavender (purple) and pear green.
I printed out letters on my computer. I think the biggest font size was 1200.
The capital is from a font called Kwekel. the lower case letters are from a font called Lima Bean.
I cut the letters out, and then taped them on the blocks using masking tape.
Then I sponged on black paint, not quite reaching the sides, but making sure the letters were outlined. When the paint is dry remove the paper letters.
If you are putting the blocks outside, it would be a good idea to protect the blocks applying a stain. Just lightly sand the blocks first, dust off, and apply the stain.

Thursday, October 21, 2010

Halloween Treat Basket

This Halloween Treat basket's foundation came from a box inside a tampax super pack. These handy little half boxes make great starters for homemade baskets. With this one, I cut 3 inches off to make the basket not as deep. I glued on a handle (a one inch wide strip by 11 inches) and then I wrapped the box with orange card stock, scoring the corners using the piece I previously cut off as a guide to know where to score. The cob web was cut out with cricut. If you don't have a cricut with a cobweb in your cartridges, you can draw a cobweb, or print a cobweb clipart out on your card stock.
For the spider, I glued on a black pom pom and glued on two different sized eyes.
Then I glued on black ribbon all the way around the basket - top and bottom.  Next, I glued on a button that was embellished with ribbon and twine. Just cut a two inch piece of ribbon, lay it on top of the button. Thread in the twine from the back of the button through two holes. Tie a knot or two in the twine, catching the ribbon in it. Trim ribbon as desired.
These are so cute. I can't wait to give them away!